Tag Archives: cakes

Have your cake…..

Standard

So yes, I’ll be the first to admit that I have badly neglected my little blog.  Sigh…So much for new years resolutions….

But like always I’ve been busy…baking and designing cakes, of course.

What have I actually created, you ask?

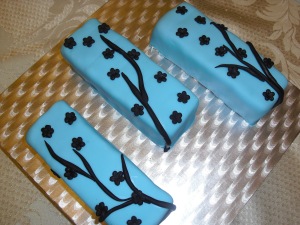
In December I was playing with cakes … these little bars are my “just a taste” cakes – when you don’t want a whole cake…but still want the decadence of sweetness.  Hehehe.

I like these cakes the best for their simplicity.  Because I was only trying it out for the first time, all three bars were vanilla and buttercream frosting, but I’m willing to make varieties.

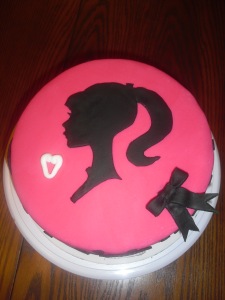
In February there was the Barbie silhouette cake….

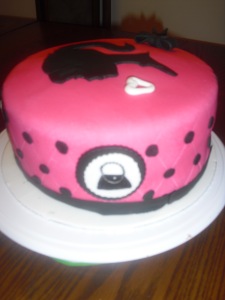
And what is Barbie without her accessories?

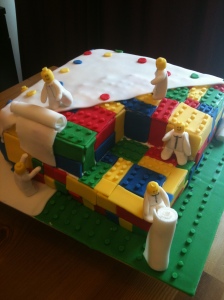
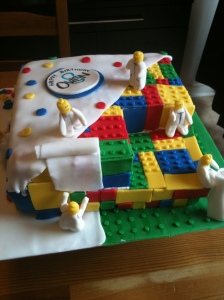
The Lego cake.

I wanted this unique cake to look like the classic Lego figures had come to life and had decided to cover up a large Lego block in fondant.

Viola!  Lego Cake!

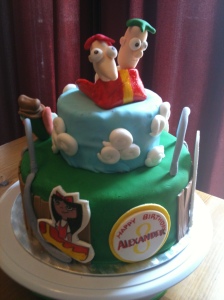
And then I designed the Phineas and Ferb cake for a friend of mine from work for her son.

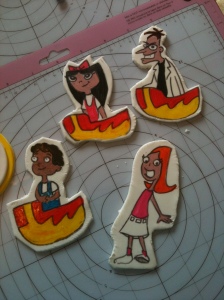
I had taken the time to paint out the cartoon characters on gum paste.

And I wanted to do the very first episode with the roller coaster….

And of course Phineas and Ferb!

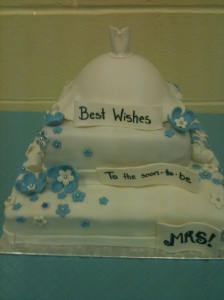
In the lovely month of March, I did a bridal shower cake for a lovely bride-to-be (whom I was honored and privileged to do her wedding cake and cupcakes this past May.)

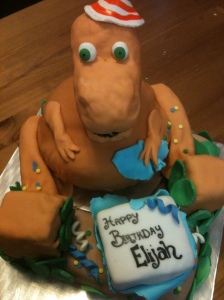
Which was followed by a Dinosaur birthday cake for another friend of mine, for her little boy….

Yes, Dinosaurs celebrate birthday’s with 3 year old little boys – haven’t you heard?!

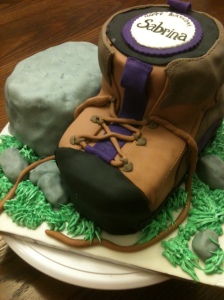
Last but not least was a Hiking Boot cake, requested by a gentleman who read my blog (yeah!!!) and simply requested this unique shaped cake for his sister’s birthday.

So there you have the last six months done in up in sweet cakes.

Hoping to bring you more soon.

L

Baby Showers

Standard

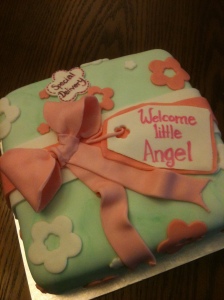
This past weekend I was asked to create two separate baby shower cakes.  One for an old friend from high school and another for my best friend.  Both blessed with beautiful babies.  A girl and boy respectively.

For my old high school friend, she requested a red velvet and cream cheese cake done up to look like a present in pink and green.  Special Delivery.  Just like her little girl.

Then my best friend, who gave birth to her third child 3 weeks before his actually due date (he really wanted to make an appearance!) was holding a baby shower the same Sunday.  Not only did she need a lot of clothes for this little boy (her previous 2 kids are girls), but she had sold a lot of baby items just previous to discovering her pregnancy.  Hehehe.

It figures, doesn’t it?

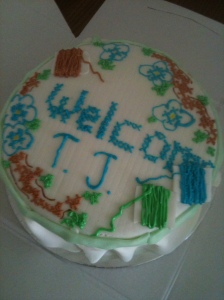
I was given free rein on what to design for her.  Knowing that she loves to do cross-stitching in her free time, I happily created a simple cross-stitched center-piece.

After trying to recreate a cross-stitch look of strings on the fondant surface (and helpless flubbing by screwing up the last “e” in Welcome that I tried covering it up with fondant “string”), I have come to the very strong conclusion that I hate cross-stitching and give my best friend a 1000 kudos for her patience in her incredible hobby!

All in all both cakes were well created for two wonderful little individuals, newly arrived in the world.

Welcome!

Cake decorating 101

Standard

I went to my first cake decorating class last Friday! 

Sadly this is after missing 2 classes before that, due to being sick for over a week.  For the record, vertigo, is not my idea of a fun – if I wanted the sensation of spinning and dizziness I would have continued my pole dancing classes.  Now that’s a fun reason to be dizzy … but I digress….

I must admit the class was interesting.  16 women of various ages all sitting around a large metal U-shaped table, pulling out varieties of cake decorating supplies and colourful icing in closed Tupperware, all preparing themselves for the 2 hours ahead.  We all have our own reasons to learn, something shared during the first class I’m sure. 

The woman sitting next to me on my right is Suzanne, a tall lady with a warm, friendly and witty manner.  She shares that she’s always wanted to take cake decorating class in the past, and jumped on the opportunity after buying the complete cake decorating supply kit on sale and seeing it as “a sign”.  At the far end of the table is a mom and daughter team, each pulling out supplies and lining them out for one another.  Their conversation is mixed with laughter and mild critique of things they have forgotten to pack, occasionally injected with shrugs and soft sighs from each woman.  Then there is the cute and eager 16-year-old girl sitting on the opposite side of the room.  She has braces and a smile as sweet as the icing she takes out from her bag.  Her hand shoots up at every moment to ask a question or to show pictures of last weeks project.  Oh to be 16 again….

This week we’re suppose to work on piping details.  Drop flowers.  Swirled flowers.  Rosettes.  Simple enough.  I fit my piping bag with the incorrect tip (it’s actually a smaller version of the tip our instructor asks for).  I smile at the instructor who notes that it’s well done, just small.  I instantly feel like I’m back in school on the first day of class with out a pencil.

We change the tips of the piping bag in unison and move onto shells.  Once again mine is just a smaller version of what everyone else is doing.  I make notes of the tips I need to buy next time I’m out shopping.

We now move onto Pompom flowers.  I finish two effortlessly, setting them aside on the table to dry.  I can move ahead to leaves.  As you can see, I do not have the correct food colouring – only having brought blue colour gel in my cake decorating caddy.  I don’t mind.  It’s as if everything has been touch by a smurf.

So my leaves are blue (like I said, something touched by a smurf – or something from Avatar).  I find these actually challenging at first.  Coming out looking like elephants.  C’est la vie, it’s a design detail…  By my fourth attempt I am improving.  I do better with the ruffled leaves, making a mental note that in the future all my iced on leaves will be ruffled from now on.

We are given the rest of the class for free rein to decorate cupcakes.  Because I wasn’t here last week, I am decorating the full size cake I brought in.  I don’t mind.  I decorate half of it with white drop flowers, adding blue ruffled leaves in between for detail and contrast.  It looks decorative, the instructor says as she passes me … in reality I’m just using up my icing before packing it up.

Next week is our last class.  We’re suppose to bring in a smooth iced cake to decorate, of course.  Graduation, our instructor smiles.

A few sweet months of CAKES

Standard

I can’t believe the year is almost over!

In a few days we’ll be entering 2011.  So what do I have to show for 2010?

 Well, my lovely cakes, of course! 

And it all started with one “little” castle cake that I took on rather ambitiously, especially since I had no I idea what I was doing when I was doing it.  The end result is not my favourite, but was the delight of the recipient who received it – and that’s all that really matters, isn’t it?

Since July, I’ve been staying up late at night, mixing up batches of cakes (and
occasionally cupcakes & cookies), burning my fingers against hot cake pans, rolling fondant, cutting fondant, spreading frosting, piping frosting … well, you get the picture.  What have I learned during my late night endeavours?

  1. That sleep is few and far between, some nights in my house.
  2. That I really do watch way too much “Ace of Cakes” and “Cake boss”.
  3. Fondant is a great invention!
  4. And although I’m a perfectionist/ control freak at the highest point of stress when trying to get every little detail set in the right way on my cakes – I truly enjoyed every single moment creating them.

To all my friends and family
who have been nothing but supportive (and have acted as guinea pigs
trying some new recipes and flavours) 

 THANK YOU!


Here’s hoping that 2011 brings on more challenges,  more cakes, cupcakes and treats.

L

Christmas is coming….

Standard

In honour of the Christmas season, I decided to create a “present” cake for some family members for an annual Christmas gathering.  After some careful thought, I finally decided on something simple – a two tiered square cake design, made to look like presents stacked one on top of each other.  Simple, right? 

So what cakes to make?  Well since it is Christmas, the first thing that comes to mind is the colour red … and of course Red Velvet Cake follows closely behind in that thought.

I, by no means, hesitate at making a cake from scratch and would do so if I had the time.  However, I’m a procrastinator at heart and left this little project until 10:00 pm – which has become my usual baking hour lately.  So with that said, I love looking out for EASY recipes to help my life a little bit.  One of my favourites being a great Red Velvet recipe I found years ago on the internet.  The procrastinator in me loves that this recipe cheats by using a cake mix from a box, and unless you actually tell someone – you can’t really tell that it’s made from a mix (okay, I’m assuming that you can’t tell or else everyone is really really polite to me).  The recipe is as follows:

Easy Red Velvet Cake:

Ingredients:

  • 1 box white cake mix (2 layer size)
  • 1 box instant vanilla instant pudding
  • 4 eggs
  • 1 cup milk
  • 1/2 cup vegetable oil
  • 2 ounces red food colouring
  • cream cheese frosting

Preparation:

Mix the above ingredients for 4 minutes on medium speed.  Grease and flour cake pans.  Bake at 350 for 20 – 25 minutes or until done.  Cool cake.

Easy peasy, right?  Mix the ingredients together with red dye (I love the Wilton’s red gel with no taste, because it’s a concentration of RED colour … Red velvet is red, not pink – which I have done in the past and was really annoyed by the finished result, but that’s just me)  Anyways, mixing in the red glob of dye into the cake batter will initially result into something that looks like it was pulled straight out of a horror movie – have no fear, keep mixing until it’s all uniform and eventually it will look like this.

To add variety, I made the top-tier with a Butter Pecan cake mix.  Nothing fancy, just straight from the box.  After the cakes (4 sheets in total) were made, cooled on the rack and crumb coated with a thin layer of frosting, it’s time to move on to the fondant.  I actually like working with fondant.  It reminds me of being a kid and playing with Play-Dough (except now you can eat it).  However today this proved to be more finicky than usual.

See the cracks and pulls?  The fondant is too dry and I think I rolled it to thin.  For awhile I truly believed that if I kept running my hands over it, it would eventually smooth over.  After a few minutes of doing that, with no results – I half hoped it would, even though I knew better, I finally admitted defeat, and found that it was easier to just pull everything off and start all over again.  Sigh….

Onto a clean slate, and everything is looking much better now.  My favourite design detail has to be the bow.  5 pieces of fondant cut into stripes: 2 for loops, 1 for the bow centre and 2 for the bow ends.  (There is a great how-to technique from Cake Central on how to make beautiful pouffy bows – which is what I originally had in mind, but went for the traditional bow look.)

My finishing touch was the tag and the curlies (thin stripes of fondant swirled around a chopstick and left out to dry).  The tag I just wrote on with a black gourmet pen … and voila!

And there you go, “Presents” ready for under the tree or the dessert table….

Merry Christmas!

L